

The heat is really getting to us this summer, making us crave all things made from linen. Linen (and linen/cotton blends) are our favorite selection for summer sewing because the linen doesn't absorb as much moisture as cotton does, and leaves us feeling extra cool on these swelteringly hot days. We hit the fabric shop and bought a few yards of linen for a wide range of projects to share with you this summer! We had a Fan Friday giveaway on our Facebook page last week, and the winner was awarded a simple beach tote handmade just for them! Click more to see how we did it!
Every few Fridays we try to come up with a fun activity for our fans on Facebook -- just a little something to show we're still engaging with them, and that we appreciate everyone that follows us SO MUCH! It's truly what keeps us chugging along each day. This past Friday we were feeling especially beach-y (the heat will do that to you) so we decided to give away a beach tote and make a quick tutorial to go along with it. The construction is so easy, there aren't many steps, and you'll be loading up your towels and sunscreen in no time!
Note: This tutorial is written for someone that has some knowledge of sewing and sewing terms -- but feel free to comment if there is anything confusing!
Materials:
2/3 Yard Linen or Linen/Cotton Blend
1.5 Yards of strap material
Thread!
Process:
1. Cut your material

2. Sew up side & bottom with a French seam
Pin your rectangles on three sides (bottom and two sides) with WRONG sides touching (right side of your material will be showing on both sides -- doesn't matter which side is "right" for most linens, but this is good to know in case you're sewing with a printed material). Sew around the three sides with a 1/4" seam allowance. Flip WRONG sides out, and press down all sewn edges. Go through all three sides again (you'll be on the opposite side now, with no raw edges in sight) with a 1/2" seam allowance. Voila -- French seams, neat & tidy!
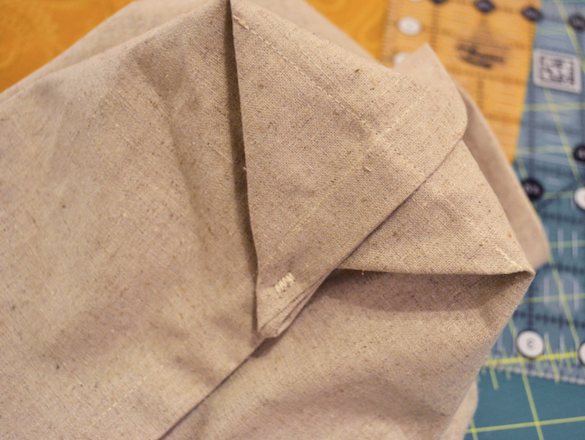
3. Square your bottom
With the interior of your bag showing (so you can see your French seams), pull each corner out, one at a time, so that your bag side seam stitching matches with the adjacent bottom seam stitching. You're trying to pull out triangular flaps, to create a flat, squared edge. See the photo above for help. With a ruler, find the place where the bottom of your "triangle" measures 4 inches across, and pin in place here. Repeat on other side.
Stitch down that 4" mark across the bottom of the "triangle" flap, making sure you backstitch at either end. Repeat on other side. Make sure your seams are all pointing in the same direction on both sides before you stitch.

Pull the flaps you just created and stitched up, so they align with each side wall. Since your seams are nice & large at 1/2", you can carefully stitch the triangle flap to the side wall seam, with a quick back & forth zigzag that only attaches seam to seam -- don't sew all the way through to your exterior! This will make the walls easier to stand up and provide a bit of extra support.

5. Create top hem & straps
Iron down a 1/2" seam toward the interior of the bag around the top of your bag. Fold again and iron with a 1 inch seam toward the interior of your bag, creating a closed rolled hem. Pin to prepare for sewing -- but don't sew yet!

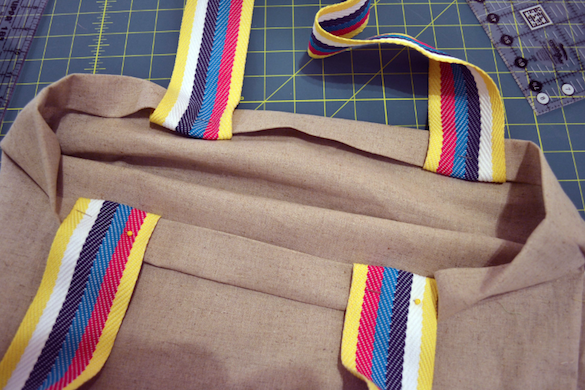
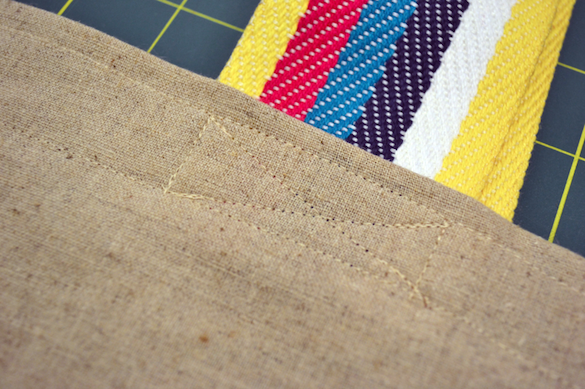
Stitch all the way around the top of your bag, close to the opening of the rolled hem to hold down in place. Stitch all the way around again, this time about 1/4" from the top of the bag so the rolled hem will stay flat when washed. Next, create a box with stitching around each strap where it meets the top hem, as show above. Finish with diagonal stitching, creating an "X" shape with your stitching. Repeat on each strap. This creates a really sturdy point, so your strap stitching won't unravel under the pressure of weight.
6. Finish straps -- this step is only necessary if you have straps wider than 2 inches!


7. Iron edges


Iron your corners to give your tote that crisp paper bag look if desired. Stash your beach essentials and head outdoors!
No comments:
Post a Comment