

We've been crazy busy with a temporary move to Portland (just for the Fall - read about it in our latest newsletter), but we're not letting that get in the way of some serious Halloween crafting! We're brewing ideas on a daily basis, and are excited to share ideas with you on great projects you can complete with supplies found in our Etsy shop. Today we're sharing a Halloween version of our favorite felt bucket (we made one for Easter, too) -- easily completed in under an hour!
For the full instructions on how to make a bucket, we have a really detailed step-by-step posting on a lined bucket here -- with Spring-themed applique elements. Today's is pretty easy to follow by the photos, but doesn't include a liner so head over to our original posting if you're having trouble inserting a liner!
First, you'll need three sheets of wool felt. You can purchase any color here, or pick up this exact set at a slightly discounted price under our Halloween section on Etsy.

Make yourself a template from paper of a circle that measures 7.5inches in diameter. A compass or pencil on a string pivoted around the center point can make this easier for you.

Cut the circle out of your piece of black felt, for the bottom of your bucket. Keep the spare piece for decoration & straps. Cut two 1.5" x 8" strap pieces from your extra before cutting out decorations. Stitch them together with a straight stitch and 1/4" seam allowance, to create a longer strap.

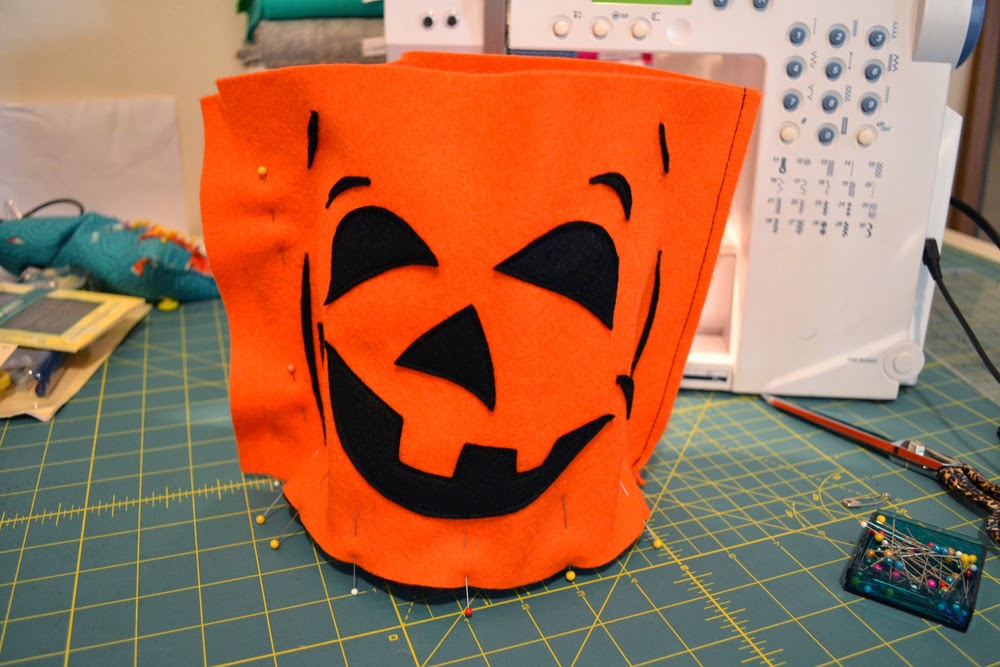
Cut your design out of your scraps. We looked at some photos of vintage Jack-o-lanterns for inspiration, and used thin black strips for shadow detailing. Have some fun cutting out free hand, or feel free to make templates from paper if you're unsure of your cutting skills. Test & plan onto one of your orange pieces of felt (horizontally).

The great thing about felt is that it kind of sticks to itself, so we stitched the pieces straight on without having to pin anything down. If you're afraid of moving pieces, check to make sure everything is in place between pieces. Backstitch at each end, and you can just do straight lines around each piece - felt doesn't fray so no need to close in the edges of your applique pieces.

Once you've stitched down your design, stitch your two orange bucket pieces together, right side out, down one side with a 1/4" seam allowance.
Beginning on the stitched side, pin your top bucket piece around the bottom circle, lining up the edges neatly. You'll have a slight overhang.

Flatten front piece with the pattern up against the overhang, and pin so that the front designed piece only overlaps about 1/4". Pin down, but save this stitching until after you have stitched the bottom, just in case things shift a bit.

Begin stitching around the bottom, with a 1/4" seam allowance, just on the other side of the back overhang flap. Adjust your edges as needed, and make sure you pull your pins out before you get to them to avoid breaking needles! Take your time going around, and readjust alignment as necessary. Stitch up to where the front meets the back with a 1/4" overhang.

Stitch up the side seam, with a 1/4" seam allowance from the front piece flap. Once the stitching is done, cut off the back piece overhang to match up with the front. Go all the way to the bottom circle to meet up with bottom stitches.

Trim top of bucket to make sure top seams are even.
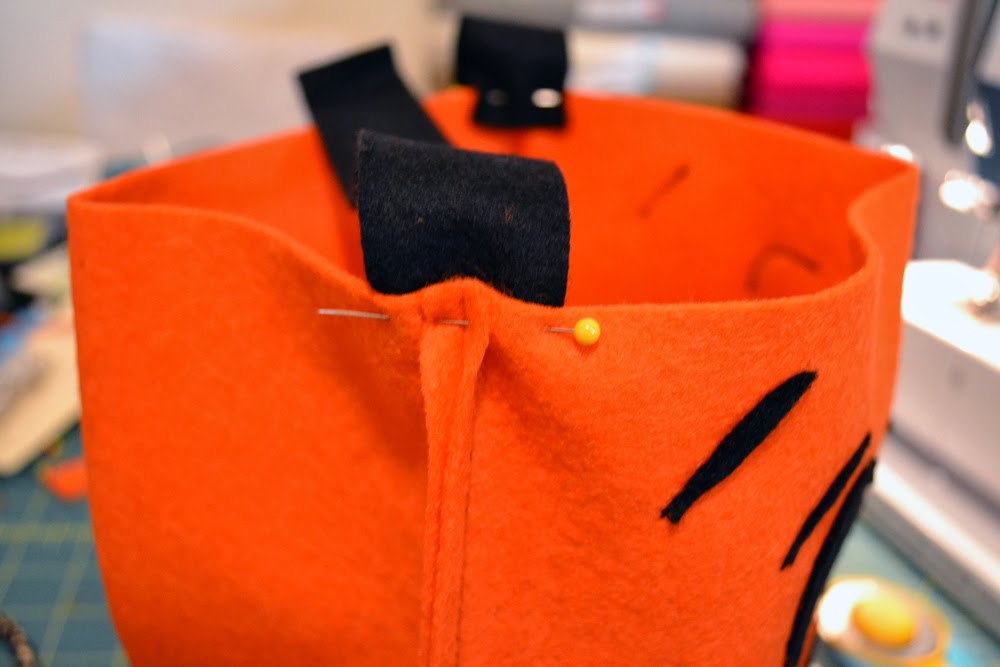
Pin your strap (make sure there's no twist in it!), centered on each top side seam, hanging into the bucket just over 1/4".

Stitch a little rectangle to hold straps in place on both sides. We kept our strap seam facing up, so the "exposed seam" look is consistent with the outside of the bucket.

You're all set! Looking for felt for this project? Buy it here!
Great felt project for Halloween! I love your bucket's expression :D
ReplyDeleteThanks! I love these buckets, reminds me of a vintage Halloween :)
Delete